Robotics

How to Build an LED Circuit on a Breadboard (Kids Guide) | 2026

To light an LED on a breadboard, connect power through a resistor to the LED’s long leg and return the short leg to ground. This kids guide covers polarity, resistor role, and common mistakes.

Priyanshi Rai
GeekashramJr mentor
published
5 Minutes
read time
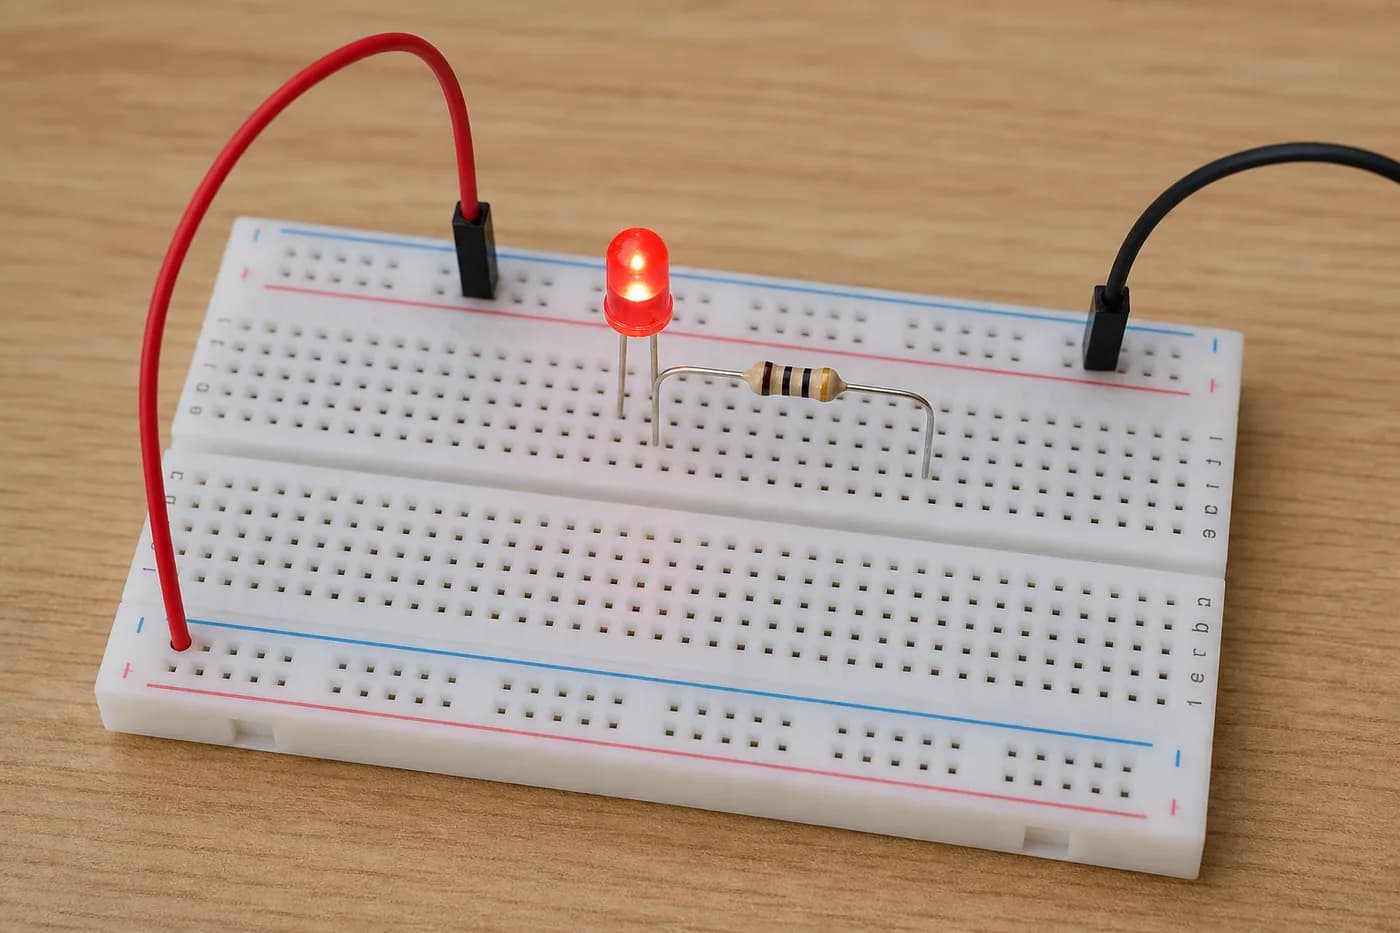
Lit LED circuit on a breadboard with resistor for beginners

An LED circuit on a breadboard is the first real electronics win for kids. Power goes through a resistor into the LED’s long leg; the short leg returns to ground. If polarity or wiring is wrong, the LED stays dark — and that debugging is part of learning.

Components Required

  • Breadboard
  • LED (any colour)
  • Resistor (commonly 220Ω–1kΩ)
  • Jumper wires
  • 5V supply (USB power bank/module as guided by mentor)

Step-by-Step Wiring

  • Connect 5V and GND to the breadboard power rails
  • Place the resistor from the positive rail to an empty column
  • Insert the LED long leg into that same column
  • Insert the LED short leg into a different column tied to GND
  • Power on and confirm the LED lights

Common Mistakes

  • Skipping the resistor
  • Reversing LED polarity
  • Putting both LED legs in one column
  • Forgetting to power the rails

Next in this series: buzzers, motors, relays, then robot builds. Continue with GeekashramJr’s breadboard and robotics path after a trial session.

FAQ

How to Build an LED Circuit on a Breadboard (Kids Guide) — questions parents ask

A resistor limits current so the LED does not burn out. Beginners usually start with around 220Ω–1kΩ depending on supply and LED type.

The longer leg is usually the anode (positive). The shorter leg is the cathode (negative/ground).

Check polarity, resistor placement, power rails, and that both LED legs are not in the same column.

Not sure which track fits your child?

Book a 45-minute trial session. A mentor works with your child, sees how they think, and recommends the track. The trial fee is adjusted if you continue.

Chat withExpert